Disclosure: This post may contain affiliate links. I may earn a small commission for my endorsement, recommendation, testimonial, and/or link to any products or services from this website.
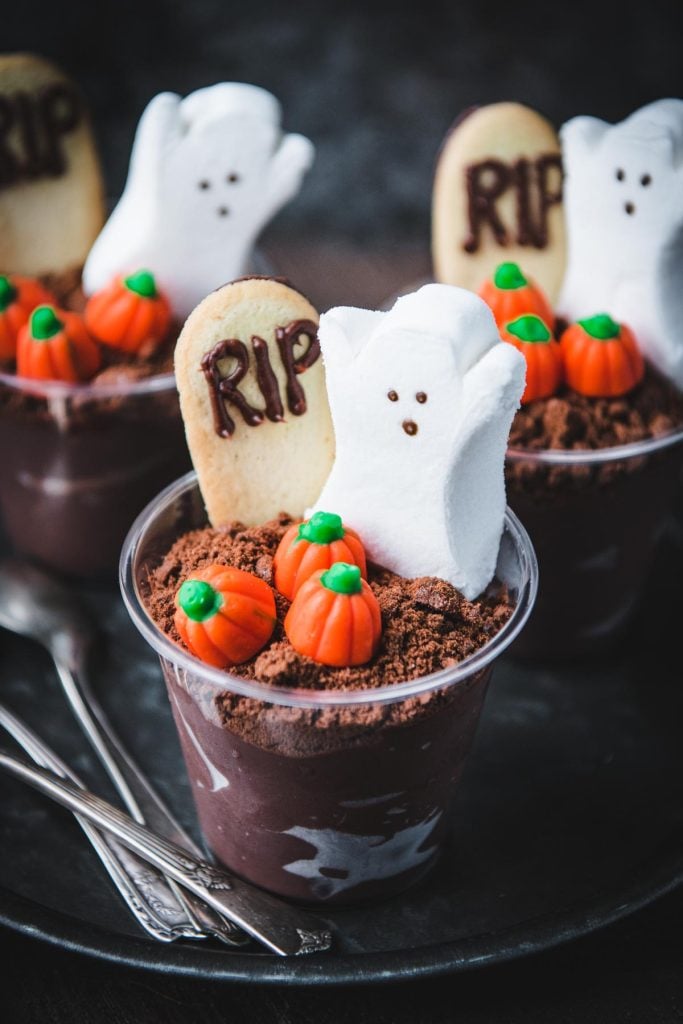
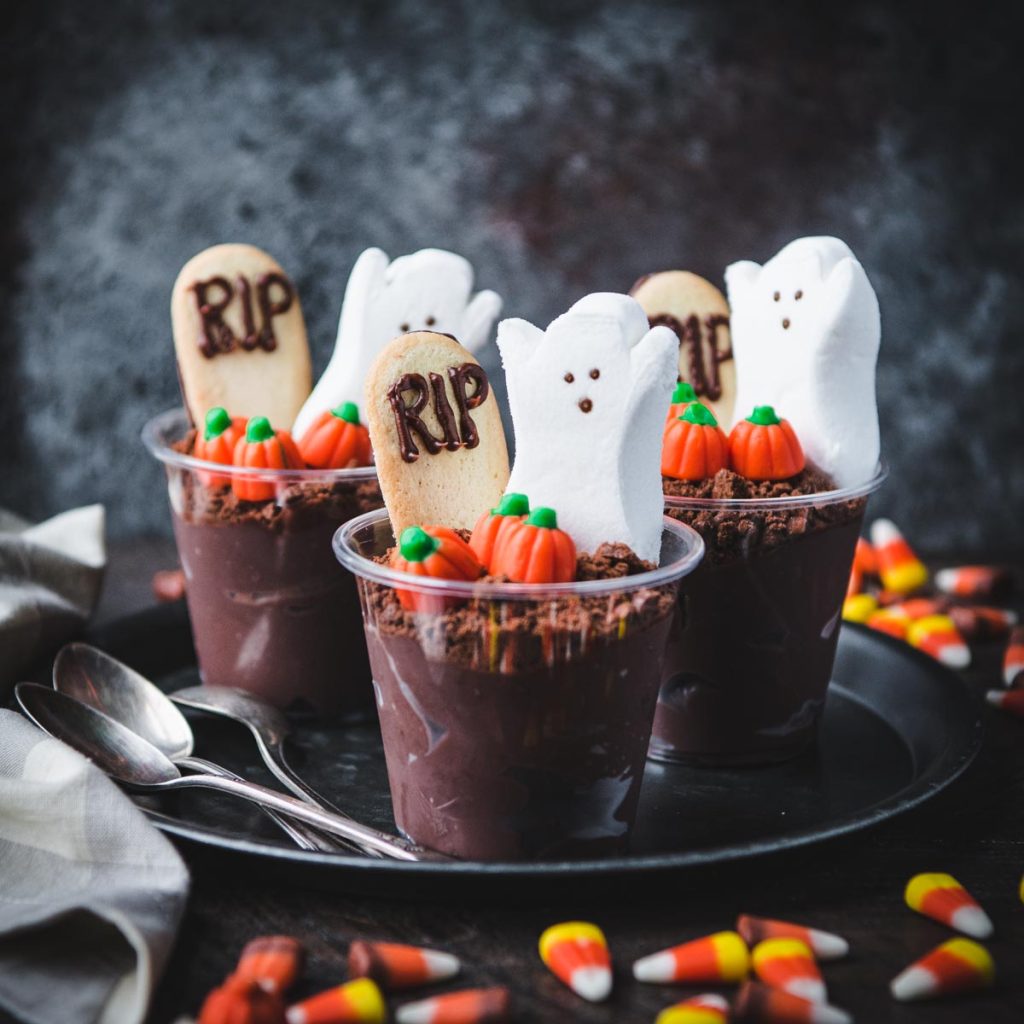
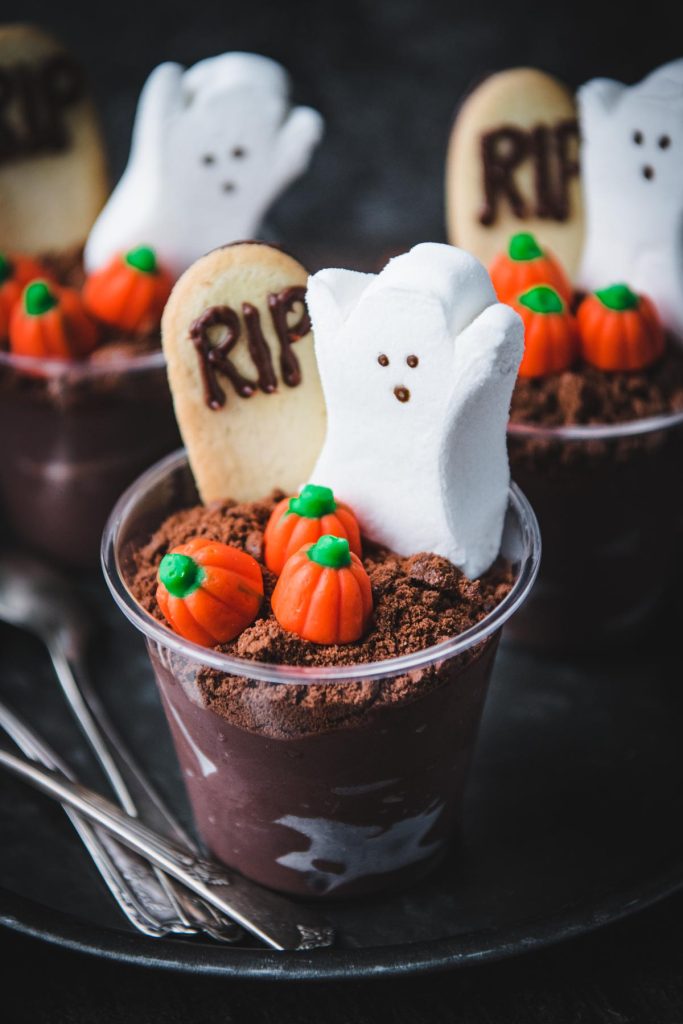
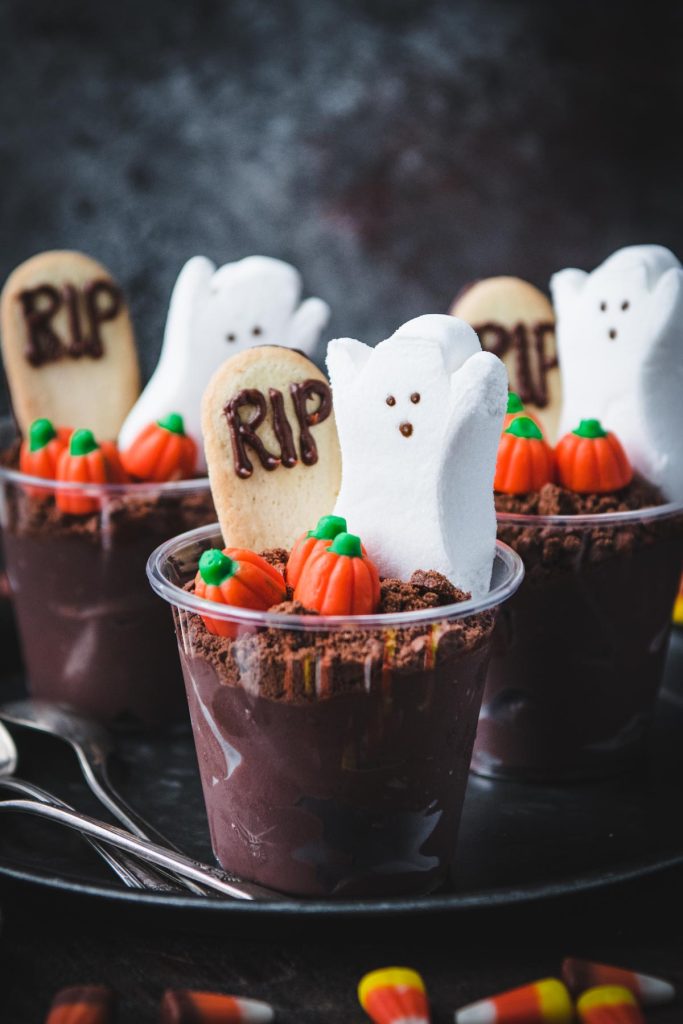
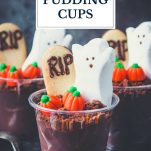
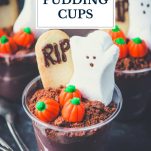
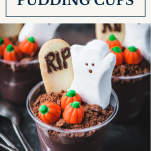
These “Ghosts in the Graveyard” pudding cups are an easy Halloween dessert that both kids and adults will love! Best of all, they’re quick to assemble and don’t require any cooking. The no-bake treats are perfect for Halloween parties, classroom snacks, or a festive holiday activity that your kids can help with!
Easy Halloween Desserts
If you’re like me and you need a fun last-minute Halloween dessert idea, then you’ve come to the right place…because this one is easy! After all, the holiday is crazy enough with costumes, parties, and school activities. The last thing that any of us needs is extra work or a complicated project! Fortunately, these easy Halloween desserts don’t require any cooking or baking — just assemble as many pudding cups as you need, and your “job” is done!

Dirt Pudding Cups
“Dirt pudding” is a classic American dessert that’s made with layers of chocolate pudding, sometimes cream cheese and whipped cream, and crushed Oreo cookies. It often includes gummy worms or flowers so that the cookie crumb “dirt” looks more like a garden.
We’re taking the same simple idea and creating easy Halloween dessert pudding cups that I call, “Ghosts in the Graveyard.” I’ll share the instructions below, but you really don’t even need a recipe!
Ingredients
This is just a quick overview of the ingredients that you’ll need for this easy Halloween dessert idea. As always, specific measurements and step-by-step instructions are included in the printable recipe box at the bottom of the post.
- Clear plastic cups: I used these 9-ounce cups, but small wide-mouth glass jars will also work.
- Chocolate pudding: use prepared chocolate pudding cups for a shortcut, or make your own chocolate pudding at home with a boxed mix. If you’re using the little prepared pudding cups, you’ll need about 2 pudding cups to fill each of the 9-ounce glasses.
- Chocolate graham crackers: use regular chocolate graham crackers, chocolate Teddy grahams, or even Oreo cookies. Crush the grahams to make the “dirt.” Kids can help with this part!
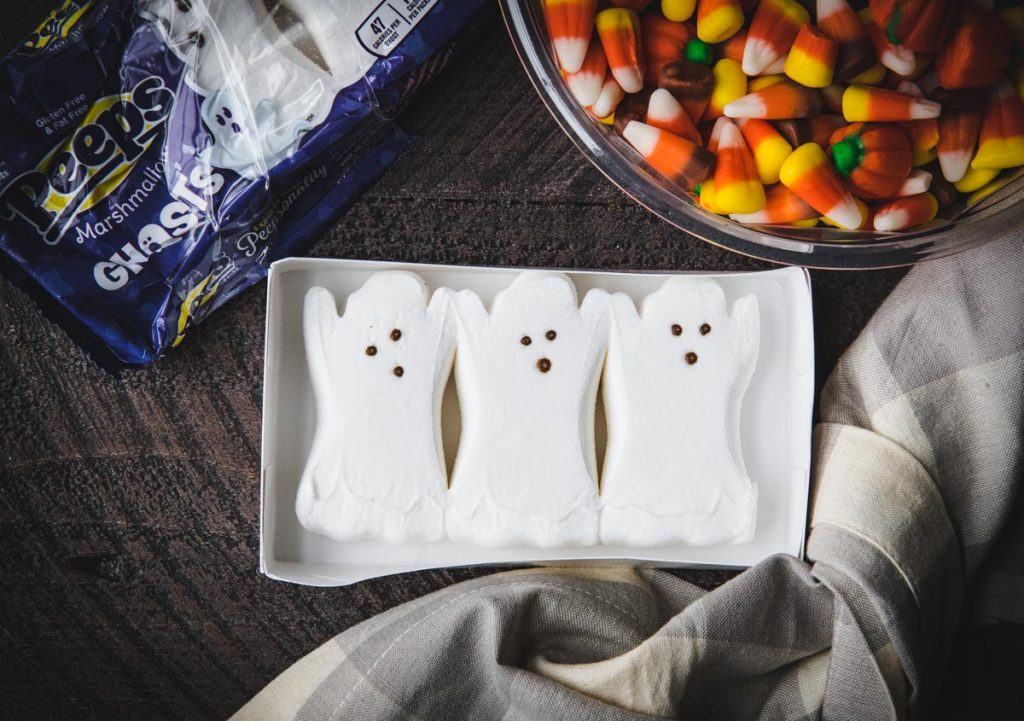
- Marshmallow ghosts: I use these Peeps ghosts, but you might also like to try other ghost-shaped candy (such as these white chocolate Reese’s ghosts).
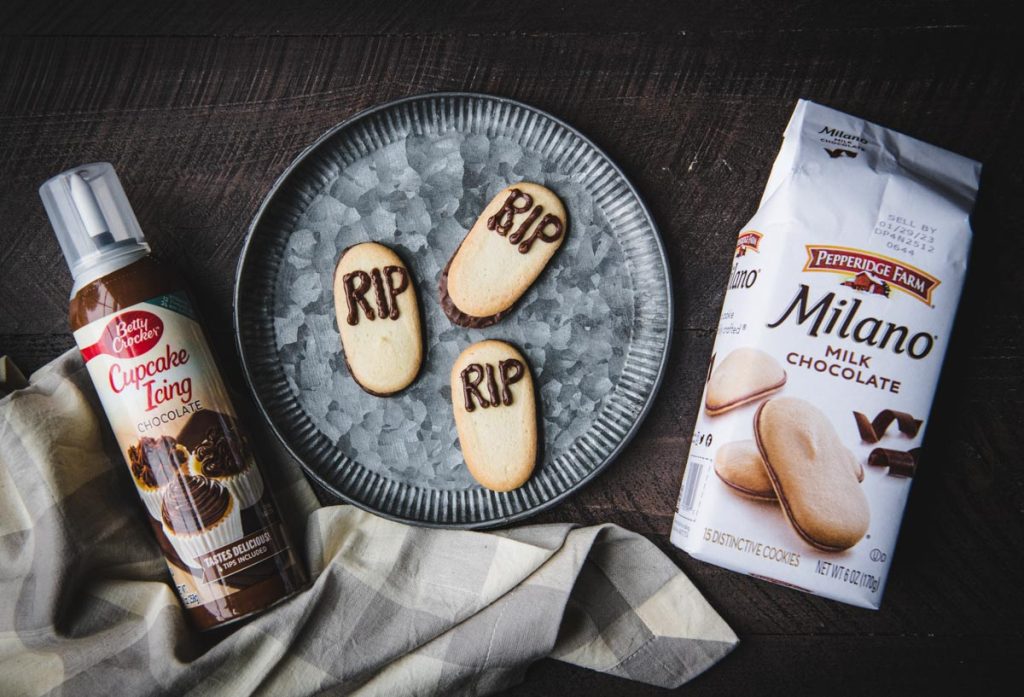
- Milano cookies: these form the headstones for your graveyard. Any variety of Milano cookie will work fine, but my boys especially like the double milk chocolate version.
- Chocolate frosting: to pipe the “RIP” letters onto the cookies. This is the cupcake frosting that I use, which comes with a small piping tip. Any similar variety will work!
- Candy pumpkins: for a festive touch!
How to Make Halloween Pudding Cups
These no-bake treats come together easily, and can be scaled up or down to make as many as you need!
- Fill a clear plastic cup or jar with prepared chocolate pudding.
- Sprinkle about 2 tablespoons of chocolate graham cracker crumbs or Oreo cookie crumbs on top.
- Pipe the letters “RIP” on a Milano cookie.
- Place the cookie, a marshmallow ghost, and a few candy pumpkins in the “dirt.”
- Serve immediately, or cover loosely with plastic wrap and refrigerate until ready to enjoy.
Serving Suggestions
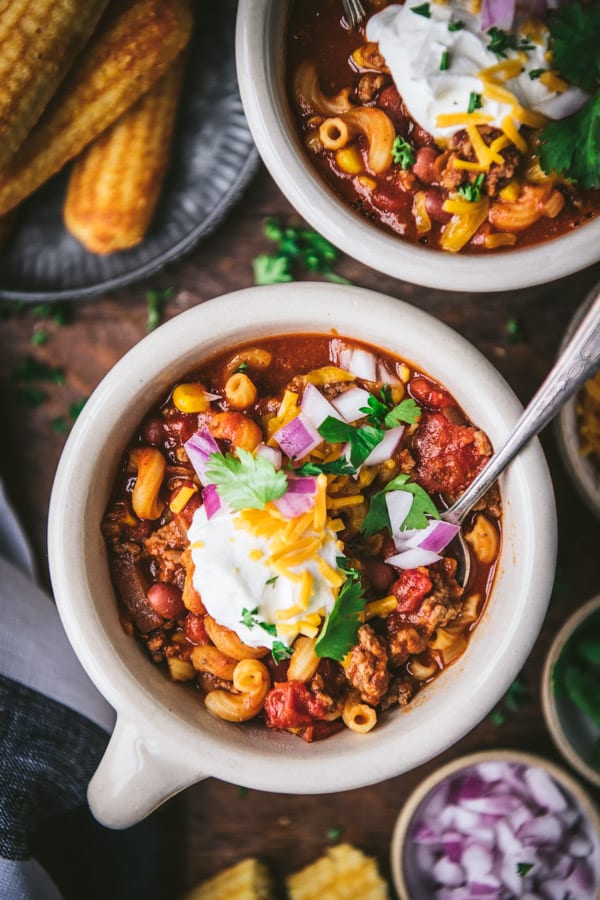
For a complete Halloween spread, offer the dirt pudding cups alongside pumpkin mac and cheese, pumpkin chili, Jack-O-Lantern mac and cheese cups, or pumpkin bars with cream cheese frosting. For the adults, don’t forget a pitcher of spooky “Hallowine” sangria!
Tips for the Best Dirt Pudding Recipe
- Scale the “recipe” up or down to create as many pudding cups as you need to serve your specific group.
- If you’re using the small prepared pudding cups, you’ll need about 2 cups to fill each 9-ounce plastic cup.
- Add creepy, crawly gummy worms, candy spiders, or other Halloween treats for even more spooky fun.
- Serve immediately, or cover with plastic wrap and refrigerate until ready to enjoy. The cups will keep in the fridge for up to 24 hours. The cookies will get soggy and the marshmallows will dry out the longer they sit, though.

“Ghosts in the Graveyard” Dirt Pudding Cups
Equipment
- 1 small plastic cup (about 9 ounces)
Ingredients
- 8 ounces prepared chocolate pudding (or enough to fill your cup almost to the top)
- 2 tablespoons chocolate graham cracker crumbs (or use Oreo cookie crumbs)
- 1 Milano cookie
- Chocolate frosting, for piping
- 1 marshmallow ghost
- 3 candy pumpkins
Instructions
- Place the prepared pudding in a clear plastic cup.
- Sprinkle the chocolate graham cracker crumbs on top.
- Using the chocolate frosting with a small decorating tip or plastic bag with the corner snipped off, pipe the letters "RIP" onto the Milano cookie. This is the headstone for your "graveyard."
- Arrange the cookie, the marshmallow ghost, and a few candy pumpkins in the cup.
- Serve immediately, or cover with plastic wrap and refrigerate for up to 24 hours. Repeat the process to assemble as many pudding cups as you like.
Notes
- Scale the “recipe” up or down to create as many pudding cups as you need to serve your specific group.
- If you’re using the small prepared pudding cups, you’ll need about 2 cups to fill each 9-ounce plastic cup.
- Add creepy, crawly gummy worms, candy spiders, or other Halloween treats for even more spooky fun.
- Serve immediately, or cover with plastic wrap and refrigerate until ready to enjoy. The cups will keep in the fridge for up to 24 hours. The cookies will get soggy and the marshmallows will dry out the longer they sit, though.


Recipes are excellent.
Thank you, Linda!